Sing's Log

Knowledge worth sharing


  • Home

  • Tags

  • Timeline

  • Portfolio

  • Service

  • Search

mybatis - Cannot determine value type from string, Cannot convert string to Timestamp

Posted on 2023-10-17 | Edited on 2024-07-16 |

Problem

These error occurs when selecting columns from the database that don’t match the model, for example:

1
org.springframework.dao.DataIntegrityViolationException: Error attempting to get column 'name' from result set.  Cause: java.sql.SQLDataException: Cannot determine value type from string 'singming'
1
org.springframework.dao.DataIntegrityViolationException: Error attempting to get column 'type' from result set.  Cause: java.sql.SQLDataException: Cannot convert string 'MALE' to java.sql.Timestamp value

Solution

Ensure your SQL query only selects columns that exist in your Java model to avoid type mismatches and data integrity issues.

Explanation

The error looks ridiculous, it is because mybatis is trying to map results from sql to some fields in the java model. e.g. mapping a name VARCHAR(255) to Date createdTime even if you add the jdbcType mapping in the <resultMap>
MyBatis expects a direct mapping between columns in your SQL query and properties in your Java model. If your SQL query selects columns that don’t exist in your model, you can encounter type mismatches errors above.

To resolve this:

  1. Review your SQL queries: Ensure that you only select columns that have corresponding properties in your Java model.

  2. Use aliases: If your SQL query retrieves columns with different names but equivalent data, use aliases to match them to the model properties.

Example

1
2
3
4
5
6
7
8
9
10
11
12
<!-- MyBatis XML Mapper -->

<!-- Result Map -->
<resultMap id="userResultMap" type="User">
<result property="name" column="name" />
<result property="age" column="age" />
</resultMap>

<!-- SQL Query -->
<select id="selectUsers" resultMap="userResultMap">
SELECT name, age FROM users
</select>
1
2
3
4
5
// Java model
class User {
private String name;
private int age;
}

In this example, the SQL query and Java model are aligned, resulting in a smooth mapping without type mismatches.

Synchronizing Remote Terraform Backend States

Posted on 2023-09-05 | Edited on 2024-07-16 |

Introduction

When cloning a project from a remote source, it’s crucial to synchronize the Terraform states from the backend to maintain consistency and accuracy.

Syncing Remote Backend State: A Quick Guide

Follow these steps to efficiently sync your remote backend state:

1. Initialize and Install Dependencies

First, initiate the process and update dependencies using the following command:

1
2
3
4
terraform init

# If you need to upgrade dependencies
terraform init --upgrade

2. Streamline Variable Input

Instead of manually inputting or exporting variables each time, simplify the process by creating a terraform.tfvars file:

1
echo "foo=bar" > terraform.tfvars

3. Removing Items Not Present in Remote

In cases where items are removed from the remote but haven’t been reflected in the state, use the following command:

1
terraform state rm <resource>.<name>

4. Importing New Items to Sync State

If new items have been added but aren’t yet synced with the state, consult the provider’s documentation to confirm import support. Then use the provided syntax:

1
terraform import <resource>.<name> <id>

Conclusion

Properly synchronizing Terraform backend states ensures your project’s integrity and consistency, especially when working with remote repositories. Following these concise steps will streamline your workflow and enhance your overall development process.

Training a Model to Solve CAPTCHA Audio Challenges

Posted on 2023-07-02 | Edited on 2024-07-16 |

In this blog post, we will explore how to train a machine learning model to solve CAPTCHA audio challenges. CAPTCHA is a widely used security measure on the web to prevent automated bots from accessing websites. It presents users with various tests to determine if they are human, one of which is the audio challenge. By training a model to solve these audio challenges, we can automate the process and improve user experience. Let’s dive into the code and understand how it works.

The Setup

Before we get into the code, let’s understand the directory structure and dependencies required for this project. Here’s an overview:

  1. login-captcha-example: This directory contains the audio files used for training and testing the model.
  2. material: This directory contains the labeled training audio files. Each audio file represents a digit in the captcha.
  3. svm_model.pkl: This is the trained SVM model file that will be generated during training.
  4. temp: This directory will be used to store temporary audio files generated during the prediction process.

To get started, make sure you have the following dependencies installed:

  • os: A module for interacting with the operating system.
  • librosa: A library for audio and music signal analysis.
  • numpy: A library for mathematical operations on multi-dimensional arrays.
  • sklearn.svm: The SVM (Support Vector Machine) model implementation from scikit-learn.
  • sklearn.metrics: A module for evaluating the performance of machine learning models.
  • subprocess: A module for spawning new processes and executing system commands.
  • string.Template: A class for string templating.
  • joblib: A library for serializing Python objects to disk and loading them back into memory.

Code Walkthrough

Read more »

Remove duplicate documents from Mongodb by keys

Posted on 2022-11-17 | Edited on 2024-07-16 |

Background

To ensure there is no duplicate documents, we could create an unique index.
However, it will throw error when there are duplicates entries in the collection:

MongoDB cannot create a unique index on the specified index field(s) if the collection already contains data that would violate the unique constraint for the index.

Remove the duplicates by keys

1
2
3
4
5
6
7
8
9
10
11
12
13
14
15
16
17
18
19
20
21
22
23
24
25
26
27
28
29
30
31
32
33
34
35
36
37
38
39
40
41
42
43
const collection = db.collection('MyCollection');
const operations: Promise<any>[] = [];
console.time('aggregation');

await collection
.aggregate([
{
$group: {
_id: {
key1: '$key1',
key2: '$key2',
},
dups: {
$push: '$_id',
},
count: {
$sum: 1,
},
},
},
{
$match: {
_id: {
$ne: null,
},
count: {
$gt: 1,
},
},
},
])
.forEach((doc) => {
console.log(doc);
doc.dups.slice(1).forEach((duplicateId: string) => {
operations.push(collection.deleteOne({ _id: duplicateId }));
});
});

console.timeEnd('aggregation');

console.time('remove duplicate');
await Promise.all(operations);
console.timeEnd('remove duplicate');

Create the unique index

1
await collection.createIndex({ key1: 1, key2: 1 }, { unique: true, name: 'unique_index' });

Mongodb connection test inside a container

Posted on 2022-07-28 | Edited on 2024-07-16 |

Background

To test the connection between a container and the mongoDB.

Steps

  1. Install mongo client

    1
    2
    3
    4
    5
    6
    7
    8
    9
    10
    11
    12
    13
    14
    # Install required package
    apt-get install gnupg

    # import the MongoDB public GPG Key
    wget -qO - https://www.mongodb.org/static/pgp/server-6.0.asc | apt-key add -

    # Create a /etc/apt/sources.list.d/mongodb-org-6.0.list file for MongoDB
    echo "deb http://repo.mongodb.org/apt/debian buster/mongodb-org/6.0 main" | tee /etc/apt/sources.list.d/mongodb-org-6.0.list

    # Reload local package database.
    apt-get update

    # Install the MongoDB packages.
    apt-get install -y mongodb-org
  2. Test the connection

    1
    2
    3
    4
    5
    # Login to mongo (Use mongo or mongosh, depends on the mongodb package version)
    mongosh "mongodb://username:[email protected]:5/dbname?authSource=admin"

    # Check the DB name
    db

Reference

  • https://www.mongodb.com/docs/manual/tutorial/install-mongodb-on-debian/#install-mongodb-community-edition

Build Puppeteer Docker image to run inside K8s cluster

Posted on 2022-07-27 | Edited on 2024-07-16 |

Background

  • To run Puppeteer, you can’t just use an official Nodejs image and npm install puppeteer
  • Below is the Dockerfile that I have tried and proved as a working solution
  • More information see the Puppeteer official troubleshooting

Dockerfile

1
2
3
4
5
6
7
8
9
10
11
12
13
14
15
16
17
18
19
20
21
22
23
24
25
26
27
28
29
30
31
32
33
34
35
36
37
38
FROM alpine

# Installs latest Chromium (100) package.
RUN apk add --no-cache \
chromium \
nss \
freetype \
harfbuzz \
ca-certificates \
ttf-freefont \
nodejs \
yarn

# Tell Puppeteer to skip installing Chrome. We'll be using the installed package.
ENV PUPPETEER_SKIP_CHROMIUM_DOWNLOAD=true \
PUPPETEER_EXECUTABLE_PATH=/usr/bin/chromium-browser

COPY package.json yarn.lock ./
RUN yarn

# Puppeteer v13.5.0 works with Chromium 100.
# RUN yarn add [email protected]

# Add user so we don't need --no-sandbox.
RUN addgroup -S pptruser && adduser -S -G pptruser pptruser \
&& mkdir -p /home/pptruser/Downloads /app \
&& chown -R pptruser:pptruser /home/pptruser \
&& chown -R pptruser:pptruser /app

# Run everything after as non-privileged user.
USER pptruser

WORKDIR /app

COPY . .

EXPOSE 3003
CMD ["yarn", "start"]

Enlarge Click Area by CSS pseudo element

Posted on 2022-06-06 | Edited on 2024-07-16 |

An utility class .enlarge-click-area to enlarge the click area of any elements.

Plain CSS

1
2
3
4
5
6
7
8
9
10
11
12
13
14
15
16
17
.enlarge-click-area {
position: relative;
}
.enlarge-click-area::after {
content: "";
display: block;
position: absolute;
left: 0;
top: 0;
width: 160%;
height: 160%;
/* How to calculate 18.75%:
Extra width for left-hand side: (160% - 100%) / 2 = 30%
Transform percentage will relative to the width: 30% / 160% = 18.75%
*/
transform: translate(-18.75%, -18.75%);
}

SCSS

1
2
3
4
5
6
7
8
9
10
11
12
13
14
=enlargeClickArea($ratio: 2)
position: relative

&:after
$offset: percentage((1 - $ratio) / 2 / $ratio)

content: ''
display: block
position: absolute
left: 0
top: 0
width: percentage($ratio)
height: percentage($ratio)
transform: translate($offset, $offset)

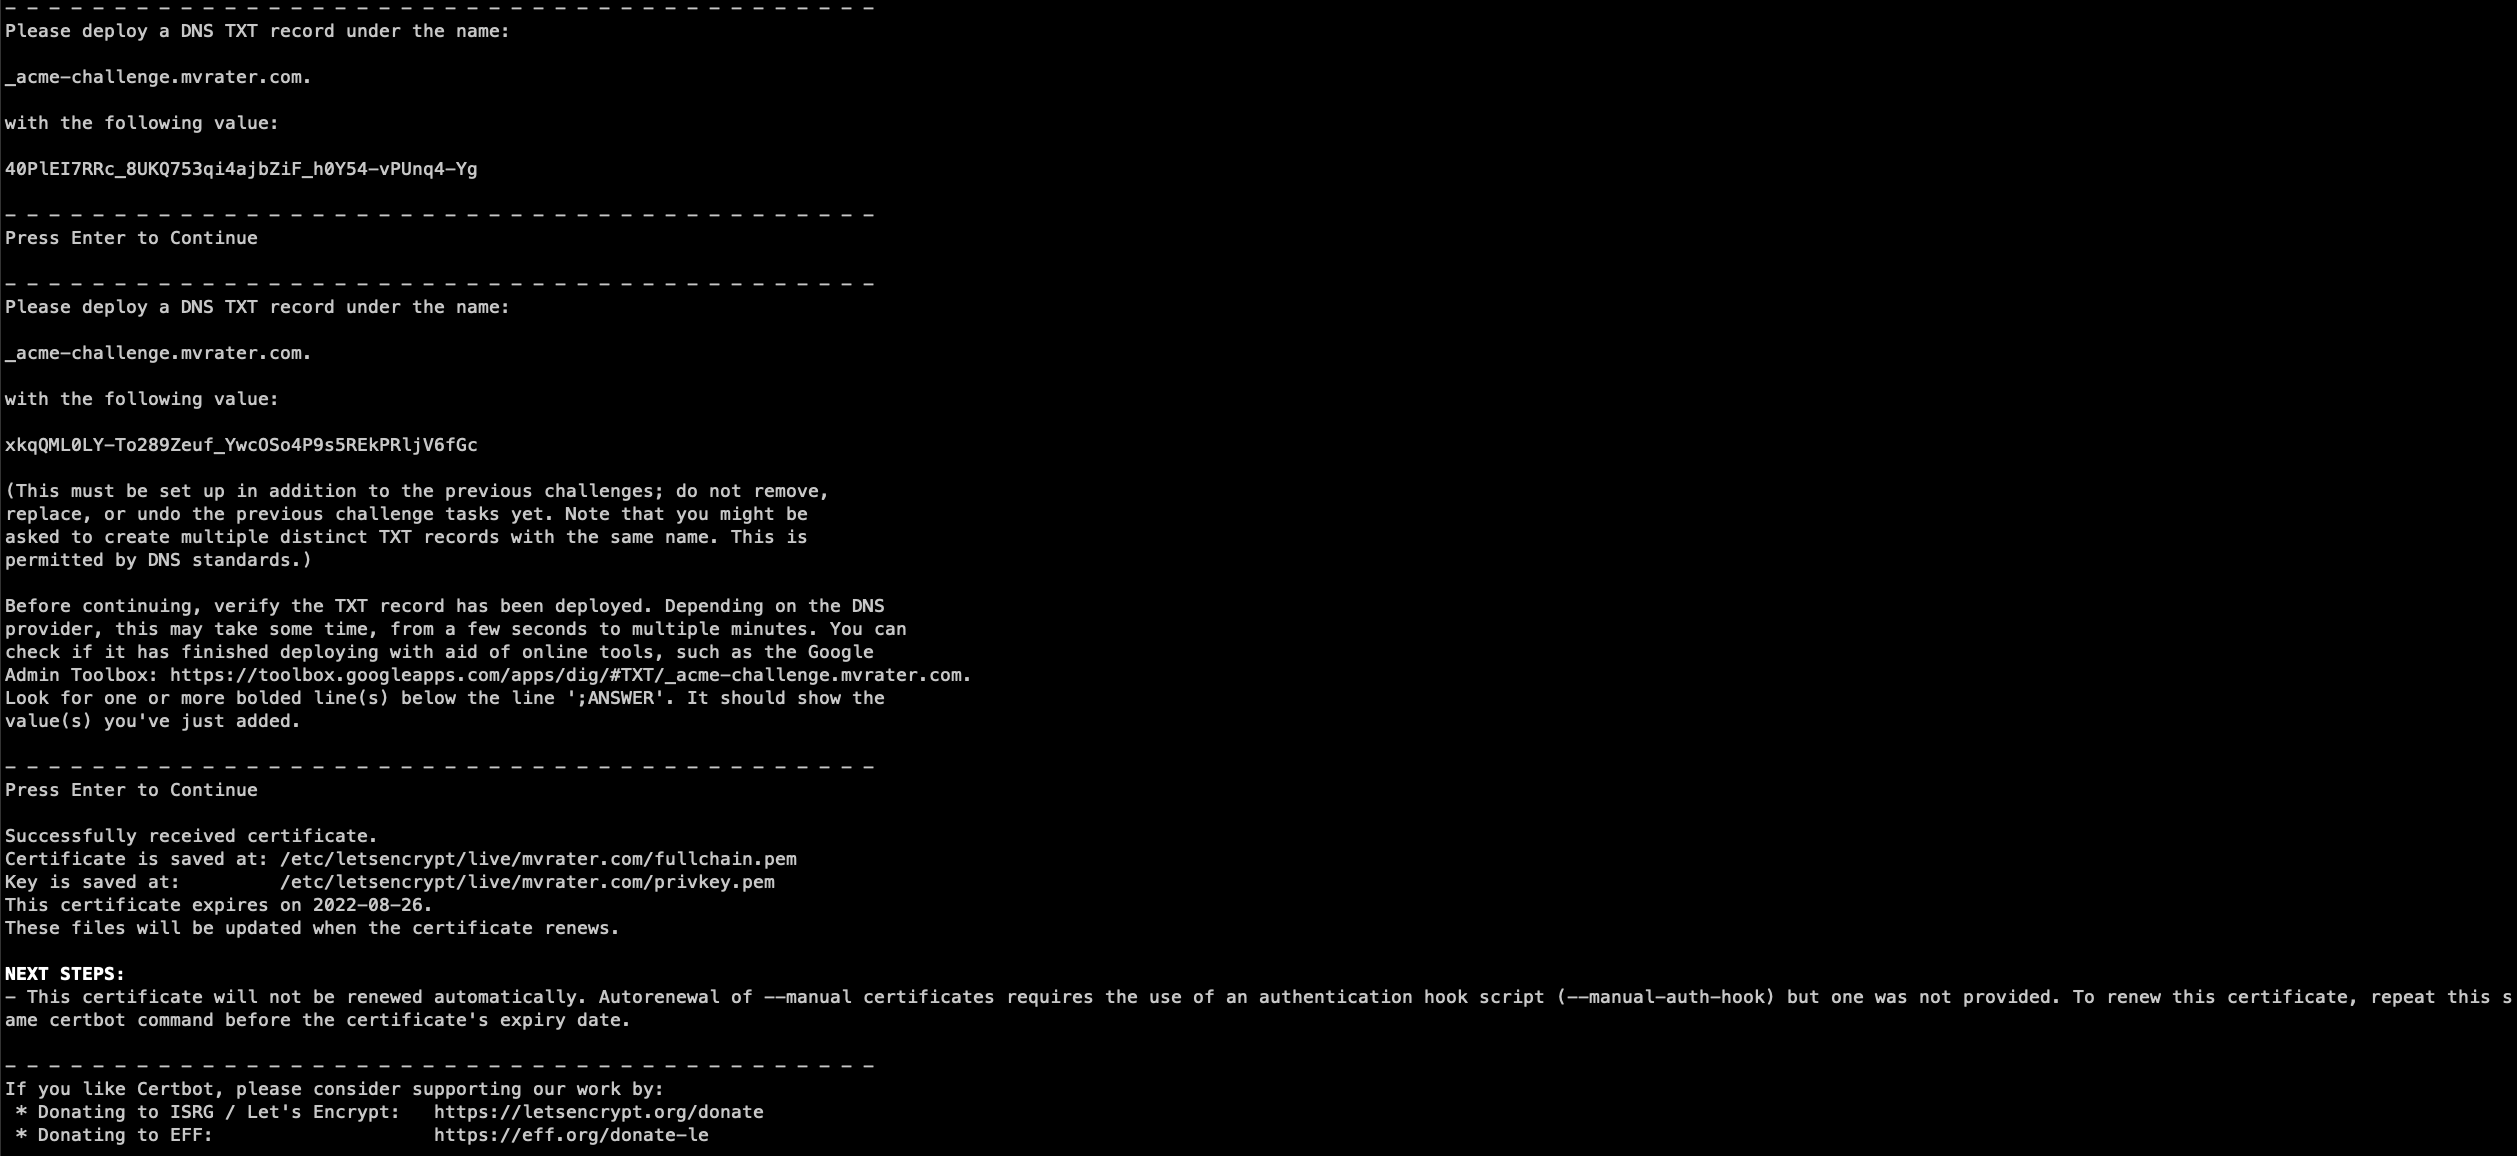
Generate Let's Encrypt certificate manually by DNS challenge

Posted on 2022-05-28 | Edited on 2024-07-16 |

Steps

  1. Create a folder for the certificate files

    1
    mkdir /tmp/cert
  2. Use the certbot command with docker:

    1
    docker run -v /tmp/cert:/etc/letsencrypt/archive -it certbot/certbot certonly --preferred-challenges dns --manual
  3. Answer the questions

  4. Go to your DNS provider to add the TXT records specified in the challenge

  5. Before hitting enter, ensure your record has published by dig tool

  6. Hit enter then you will get the certificates under /tmp/cert/{yourdomain} in your Host machine

Reference

  • Let’s encrypt - How it works?

Coding faster with Vim + IDE

Posted on 2021-09-24 | Edited on 2024-07-16 |

Vim X IDE

  • My slides share
  • Vim tutorial

JetBrains IDE + vim

  • Install ideavim
    • Custom setting
      1. Click V icon on the right bottom corner
      2. Open and edit ~/.ideavimrc
  • Tennis Kata demo - Dart + Android Studio

VScode + Vim

  • Install vscodevim
  • Setup instruction
  • Tennis Kata demo - Vscode + Javascript

SSH to server without password

Posted on 2021-09-15 | Edited on 2024-07-16 |

The requirement to ssh to server without password

To ssh without password, you must meet the condition:

  • Private key in client ~/.ssh/
  • Public key in server ~/.ssh/authorized_keys

Steps to setup

  1. Create ssh key pairs by ssh-keygen

    1
    2
    3
    4
    5
    6
    7
    # Generate key
    ssh-keygen

    # Check the generated key pair
    ls ~/.ssh
    -rw------- 1 sing staff 1679 Jun 8 2018 id_rsa
    -rw-r--r-- 1 sing staff 404 Jun 8 2018 id_rsa.pub
  2. Login to your server

  3. Copy the content of the publicKey (id_rsa.pub) to server’s ~/.ssh/authorized_keys

    1
    echo "${public key content}" >> ~/.ssh/authorized_keys
  4. Make sure the sshd setting /etc/ssh/sshd_config allow publickey authentication,

    1
    PubkeyAuthentication yes

    Restart by sudo systemctl restart ssh if you modify the sshd setting.

  5. Modify ssh config (~/.ssh/config) in your client to indicate which ssh key to use

    1
    2
    Host <server ip>
    IdentityFile ~/.ssh/id_rsa
  6. Verify ssh without password

    1
    ssh username@serverip
123…9
Sing Ming Chen

Sing Ming Chen

Sing's log, a developer's blog

90 posts
259 tags
GitHub E-Mail Linkedin Facebook
© 2024 Sing Ming Chen
Powered by Hexo v3.9.0
|
Theme — NexT.Gemini v6.3.0